The thrill of taking your first photograph is a unique experience. The desire to capture the world around you, to tell a story, to freeze a moment in time. But between this desire and reality often lies an obstacle: choosing the right gear. The market is vast and confusing, filled with acronyms, models, and prices that can discourage anyone. This guide was designed just for you, to help you navigate the jungle of photographic equipment and understand not only what to buy, but why and how to use it.
The most common mistake a beginner makes is believing that the most expensive equipment is the key to taking better photos. Nothing could be further from the truth. The real magic of photography lies in your creativity, your ability to see the light, the composition, and the right moment. The camera and lenses are just tools. And as any artisan knows, the right tools, chosen with care, can make the work simpler and more enjoyable.
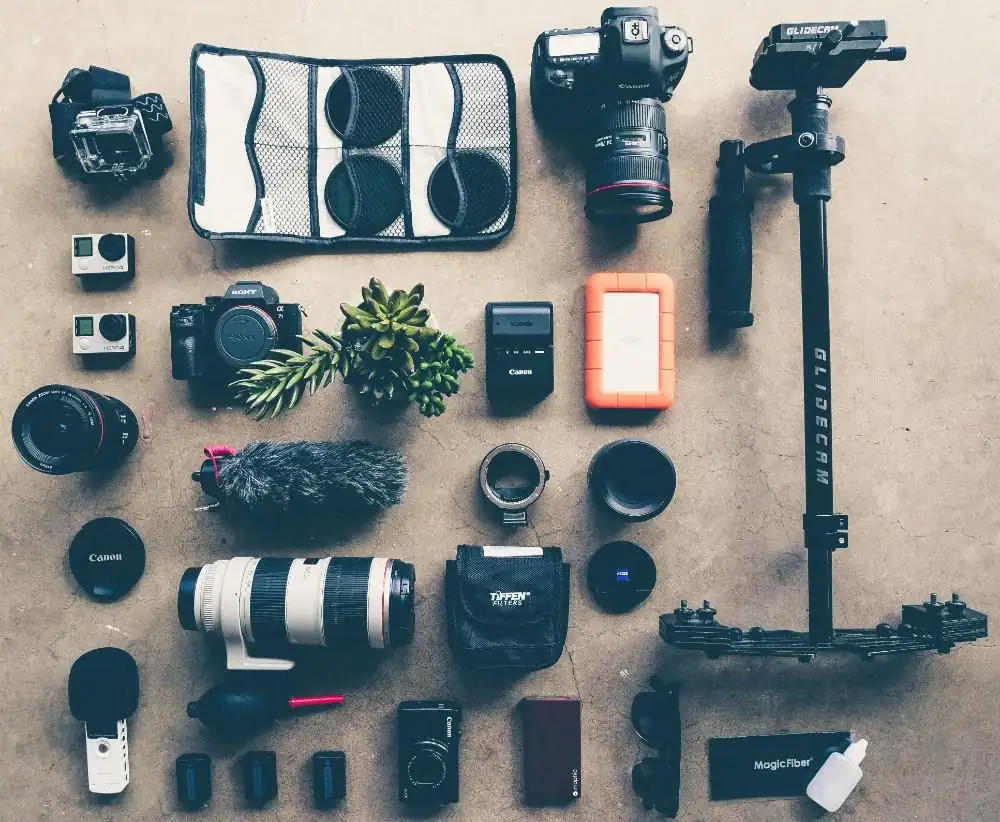
In this article, we'll explore every fundamental component of your kit in detail, from the different types of cameras to the lenses, and even the essential accessories that are often underestimated.
1. The Heart of Your Kit: The Camera Body
The camera is the first step, the device that transforms light into a digital image. For a beginner, the choice primarily comes down to two categories: DSLR cameras (Digital Single-Lens Reflex) and mirrorless cameras.

DSLR Cameras: A Legacy of the Past, Looking to the Future
For decades, DSLRs were the professional cameras of choice. Their name comes from their operating system: light enters through the lens, is reflected by a mirror (hence "reflex"), and is projected into the optical viewfinder. When you take a picture, the mirror flips up and the light hits the sensor. This mechanism, while proven, has consequences: DSLRs are generally larger, heavier, and noisier than their mirrorless counterparts.
- Pros:
- Optical Viewfinder: Offers a direct, real-time view of the scene with no lag.
- Huge Lens Selection: Thanks to decades of development, the ecosystem of lenses for DSLRs is immense, offering options for every need and budget.
- Long Battery Life: The optical viewfinder consumes less power than an electronic screen, ensuring longer battery life.
- Price: On the used market, you can find high-quality DSLR models at very affordable prices.
- Cons:
- Size and Weight: They're not ideal for carrying around all day.
- Less Tech: Many advanced features like autofocus across the entire sensor or eye-tracking autofocus are less effective or absent in entry-level models.
- Noise: The mechanical "click" of the mirror can be distracting in quiet environments.
Mirrorless Cameras: The Portability Revolution
Mirrorless cameras have been the big thing in recent years. Their name, "mirrorless," explains their function: light passes through the lens and hits the sensor directly. The image is then shown on an electronic viewfinder or an LCD screen.

- Pros:
- Small and Light: They are incredibly compact and lightweight, perfect for travel or daily use.
- Advanced Technology: They offer lightning-fast and precise autofocus, often with eye and face detection, which is perfect for portraits and video.
- Electronic Viewfinder: This lets you see changes to exposure, white balance, and other settings in real time before you take the shot.
- Video Capabilities: They often come equipped with advanced video features and in-body stabilization.
- Cons:
- Shorter Battery Life: The electronic viewfinder and screen consume a lot of power, requiring you to carry spare batteries.
- Lens Selection: While growing rapidly, the selection of dedicated lenses is still not as broad as for DSLRs, although adapters exist to mount older lenses.
- Higher Price: They tend to be more expensive than equivalent-level DSLRs.
The Right Choice: For a beginner, a mirrorless APS-C camera (like a Fujifilm X-T30 or a Sony Alpha 6400) or an entry-level DSLR (like a Nikon D3500 or a Canon EOS 250D) is the ideal starting point. They offer a perfect balance of performance, user-friendliness, and cost.
2. The Camera's Eye: The Lens
The camera captures the image, but the lens is what creates it. The quality of your photo depends just as much on the lens as on the camera body.

Kit Lenses: The Starting Point
Most beginner cameras are sold in a "kit" with a standard lens. The most common is the 18-55mm f/3.5-5.6. The numbers 18-55mm indicate the focal length, allowing you to zoom from a wide-angle to a moderate telephoto. The f/3.5-5.6 numbers indicate the maximum aperture, which changes with the zoom. This is a versatile lens and perfect for getting started.
Fixed Focal Length Lenses (Prime Lenses): Quality at an Affordable Price
Prime lenses don't have zoom. The most famous one for beginners is the 50mm f/1.8, often called "the nifty fifty."
- Pros:
- Image Quality: They are incredibly sharp and produce high-quality photos.
- Wide Aperture: Their f/1.8 aperture allows you to shoot in low-light conditions and achieve a beautiful bokeh effect (that creamy, blurry background that makes the subject stand out).
- Price: They are very affordable, representing the best value for money on the market.
- Cons:
- No Zoom: They require you to "zoom with your feet," meaning you have to physically move to frame your subject. This is actually a great way to learn composition.
Other Lens Types: Explore Your Style
- Telephoto Lenses: These have a long focal length (e.g., 70-200mm) and are great for sports or wildlife photography, allowing you to capture distant subjects.
- Wide-Angle Lenses: With a short focal length (e.g., 10-22mm), these are perfect for landscape and architectural photography.
- Macro Lenses: Designed to photograph tiny subjects up close, like insects or flowers, revealing incredible detail.
3. The Photographer's Allies: Essential Accessories
A camera and a lens are enough to get started, but these accessories will make a huge difference.

- Memory Cards: Don't skimp on quality. Choose a branded SD card (SanDisk, Lexar, Kingston) with a high-speed rating (at least U3 or V30). This ensures the camera can write data quickly, especially for 4K video or burst shooting. Having a large-capacity card (at least 64GB) is a wise move.
- Spare Batteries: Battery life is the weak point of many cameras, especially mirrorless ones. Having one or two spare batteries (either original or quality third-party) will save you from missing the perfect shot.
- Camera Bag or Backpack: Protecting your gear is crucial. Choose a bag or backpack with proper padding and modular compartments to fit your growing kit.
- Tripod: Essential for long exposures (night photos, light trails), landscapes, studio portraits, and self-portraits. A stable, lightweight tripod is a great investment.
- Cleaning Kit: Dust is the number one enemy. A basic cleaning kit, consisting of a blower bulb (to blow dust off the sensor and lens), a soft brush, and microfiber cloths, will help you keep your equipment in perfect condition.
- Lens Filters: The most important ones for beginners are the UV filter (which protects the front lens element from scratches and dust) and the circular polarizer filter (CPL), which reduces reflections on water and glass and makes colors more saturated, especially in the sky.
4. Beyond the Click: The Digital Workflow
A photographer's job doesn't end with the shutter button. Another crucial part of the process is post-production.
- Shoot in RAW: This "raw" file format contains all the information collected by the sensor. Unlike JPEG, which is a compressed, "ready-to-use" file, RAW gives you maximum flexibility to adjust exposure, colors, and white balance in post-production without losing quality.
- Post-Production Software: You don't need expensive software to start. There are free alternatives like GIMP or Darktable. If you decide to invest, Adobe Lightroom is the industry standard for organizing and editing photos.
5. From Theory to Practice: The Fundamentals of Photography
With your gear in hand, it's time to learn how to use it. The three most important settings every beginner needs to master form the "Exposure Triangle":

- ISO: The sensor's sensitivity to light. A low ISO (100-200) produces clean, sharp photos; a high ISO (1600+) is necessary in low-light conditions but can introduce digital "noise" (graininess).
- Shutter Speed: The duration the sensor is exposed to light. A fast shutter speed (e.g., 1/1000s) "freezes" motion (good for sports); a slow shutter speed (e.g., 1/2s) creates a motion blur effect (ideal for a waterfall).
- Aperture: The size of the opening that lets light pass through the lens. A wide aperture (e.g., f/1.8) lets in a lot of light and creates a shallow depth of field effect (bokeh); a narrow aperture (e.g., f/16) lets in little light and keeps a larger portion of the scene sharp (ideal for landscapes).
Conclusion
Equipment is the first step, but a photographer's journey is made of constant learning, practice, and, above all, passion. Start with a simple kit, get to know it inside and out, and don't be intimidated by the endless options on the market. The camera you have in your hands is already the only thing you need to tell your story. And your vision, your curiosity, and your creativity will always be the most important part of your gear.