🍳 Why Cleaning Your Gear Matters
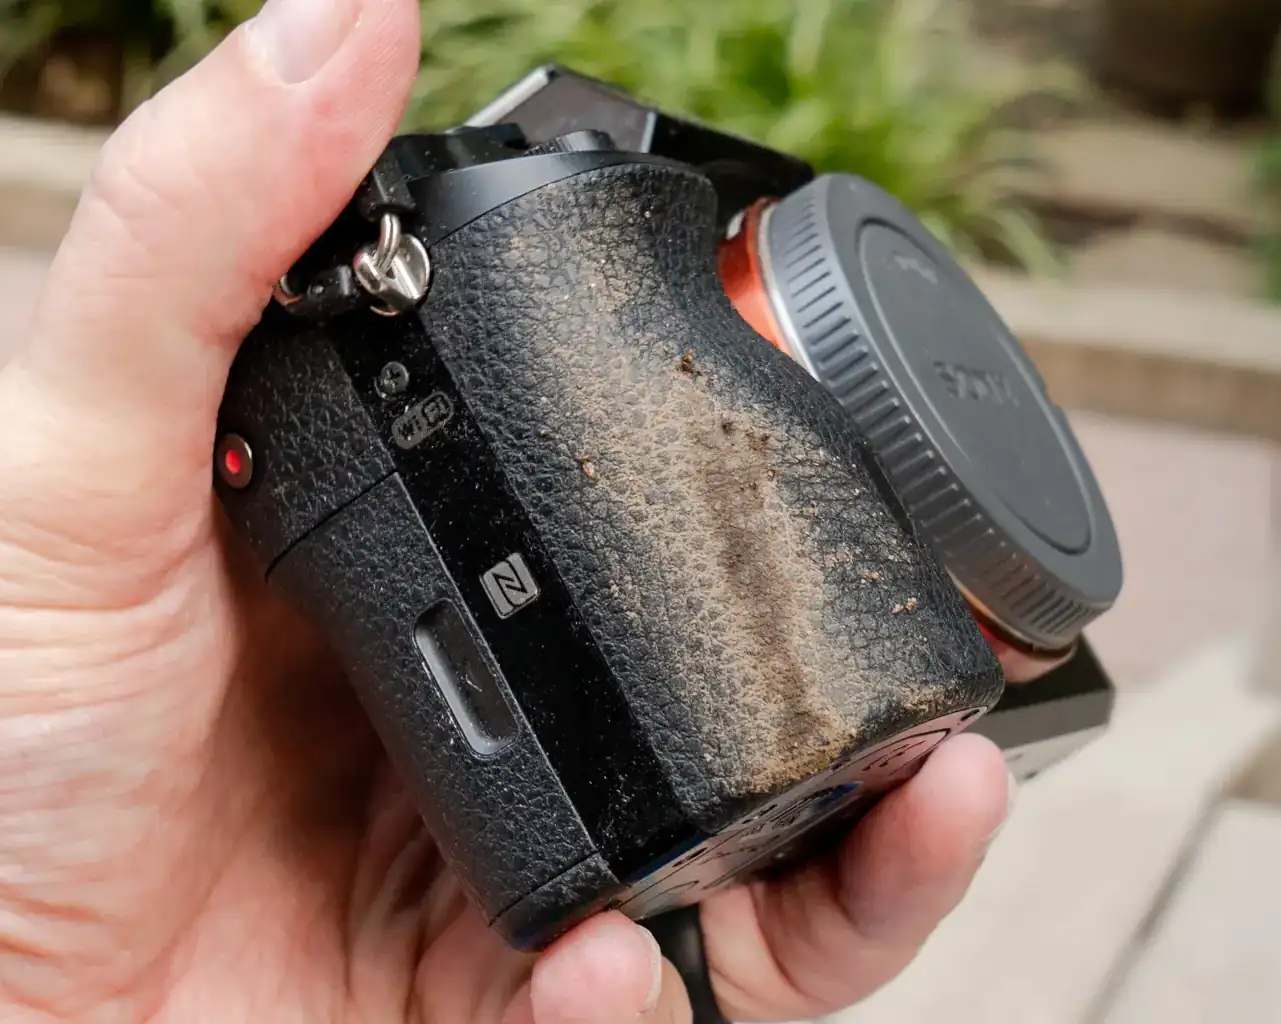
After a long day shooting in the city, the mountains, or the beach, your camera and lenses have seen it all: dust, fingerprints, water droplets, sand, and even smudges from careless handling.
Cleaning your gear isn’t just about appearances — it’s about preserving your investment and ensuring peak performance. A dirty lens can cause soft images, flare, or unwanted spots, and dust inside your camera sensor can ruin shots and be expensive to fix.
In this article, we’ll walk you through safe, effective methods to clean both lenses and your camera body after a session, so you can keep shooting without worry.
🧴 What You’ll Need
Before you start, gather some essential tools. These are inexpensive and will protect your gear better than improvising with random cloths or tissues.
Essential Cleaning Tools:
- Air blower: A manual bulb blower to remove dust without touching the glass.
- Lens brush: Soft, anti-static brush for delicate surfaces.
- Microfiber cloths: For wiping lenses and the camera body. Avoid regular tissues or clothing.
- Lens cleaning solution: Specially formulated for optics — never household cleaners.
- Sensor swabs / sensor cleaning kit: Only if you’re cleaning the sensor. Optional if you’re not comfortable doing it yourself.
- Cotton swabs or soft brush: For corners and crevices.
Having these on hand will make the cleaning process easier and safer for your gear.
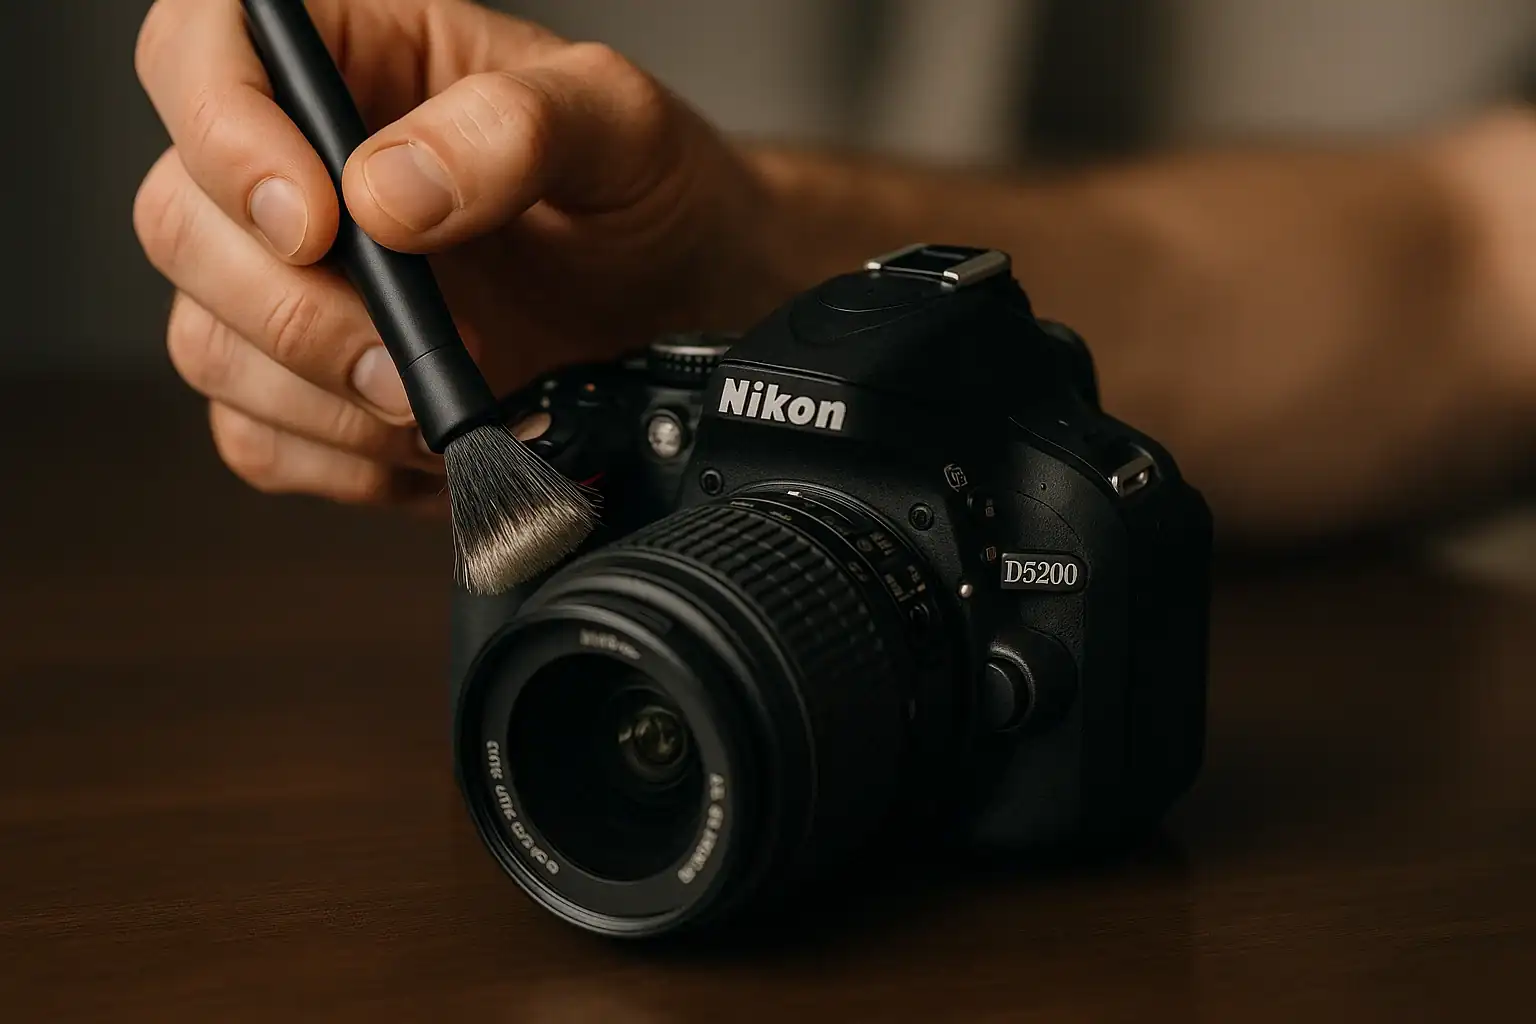
🥽 Step 1: Cleaning the Exterior of the Camera
Start by removing obvious dirt and dust from the camera body.
- Remove the lens: Always start by detaching your lens to avoid accidental scratches or dust falling into the camera body.
- Use an air blower: Blow away loose dirt and sand from buttons, dials, and the top plate. Avoid canned air — too strong and it can force dust deeper inside.
- Wipe the body: Use a lightly dampened microfiber cloth to clean the exterior. Focus on fingerprints, sweat, or grime. Avoid getting moisture into the battery compartment or ports.
- Crevices and corners: Use a soft brush or a cotton swab to remove dust from small areas like strap lugs and around buttons.
Pro tip: Regularly check your battery and memory card slots — dirt here can cause connection issues.
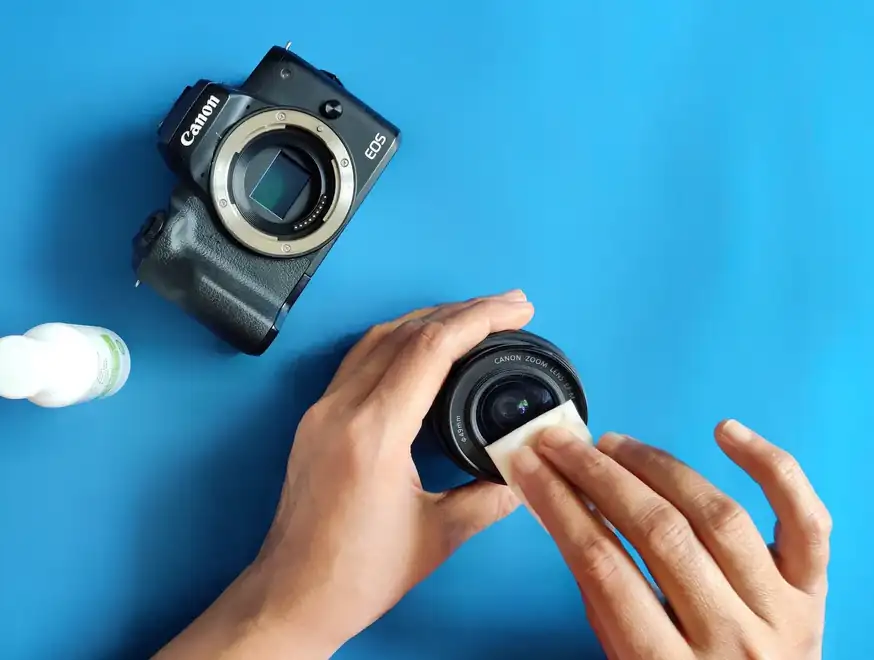
🔍 Step 2: Cleaning Your Lens Exterior
Lenses attract smudges, dust, and water marks faster than any other part of your camera. Cleaning them correctly is crucial.
- Use a blower first: Remove loose dust from both the front and rear elements.
- Brush gently: A soft lens brush can remove finer particles without scratching the glass.
- Apply lens cleaner sparingly: Put 1–2 drops on a microfiber cloth (never directly on the lens).
- Wipe in circles: Start from the center and move outward in gentle circular motions. Avoid excessive pressure — the lens coatings are delicate.
- Check your lens hood and cap: These areas also collect dirt and grime; wipe them down regularly.
Never use tissues, paper towels, or your shirt — they can scratch coatings and leave fibers behind.
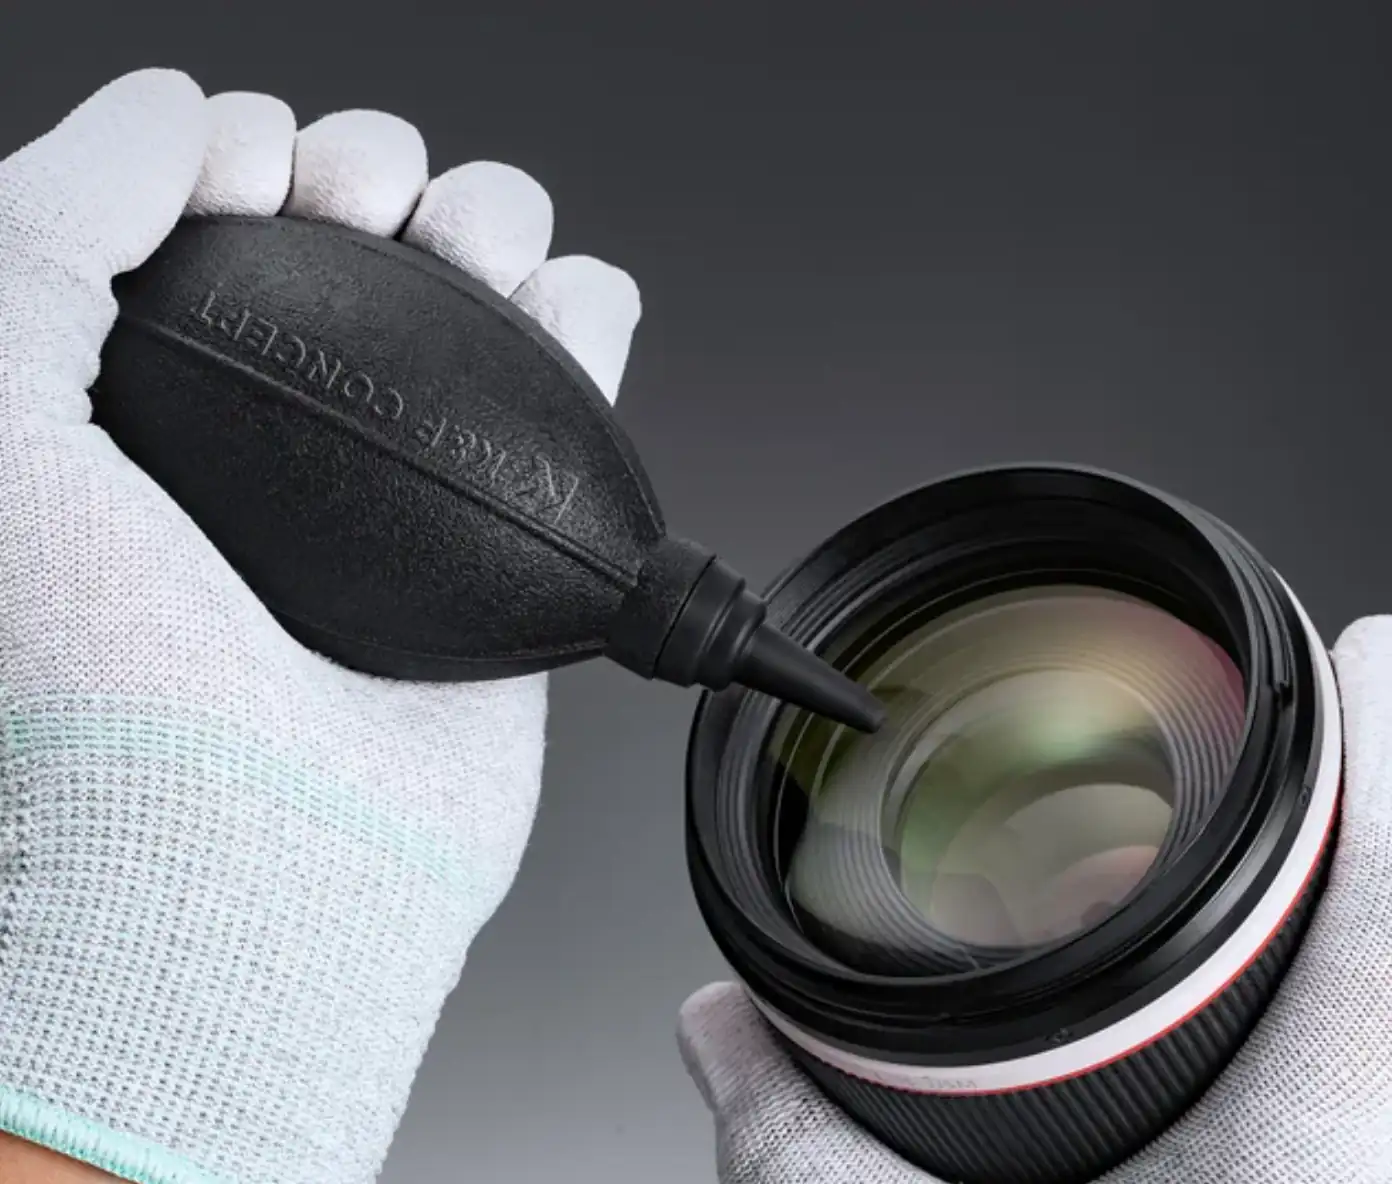
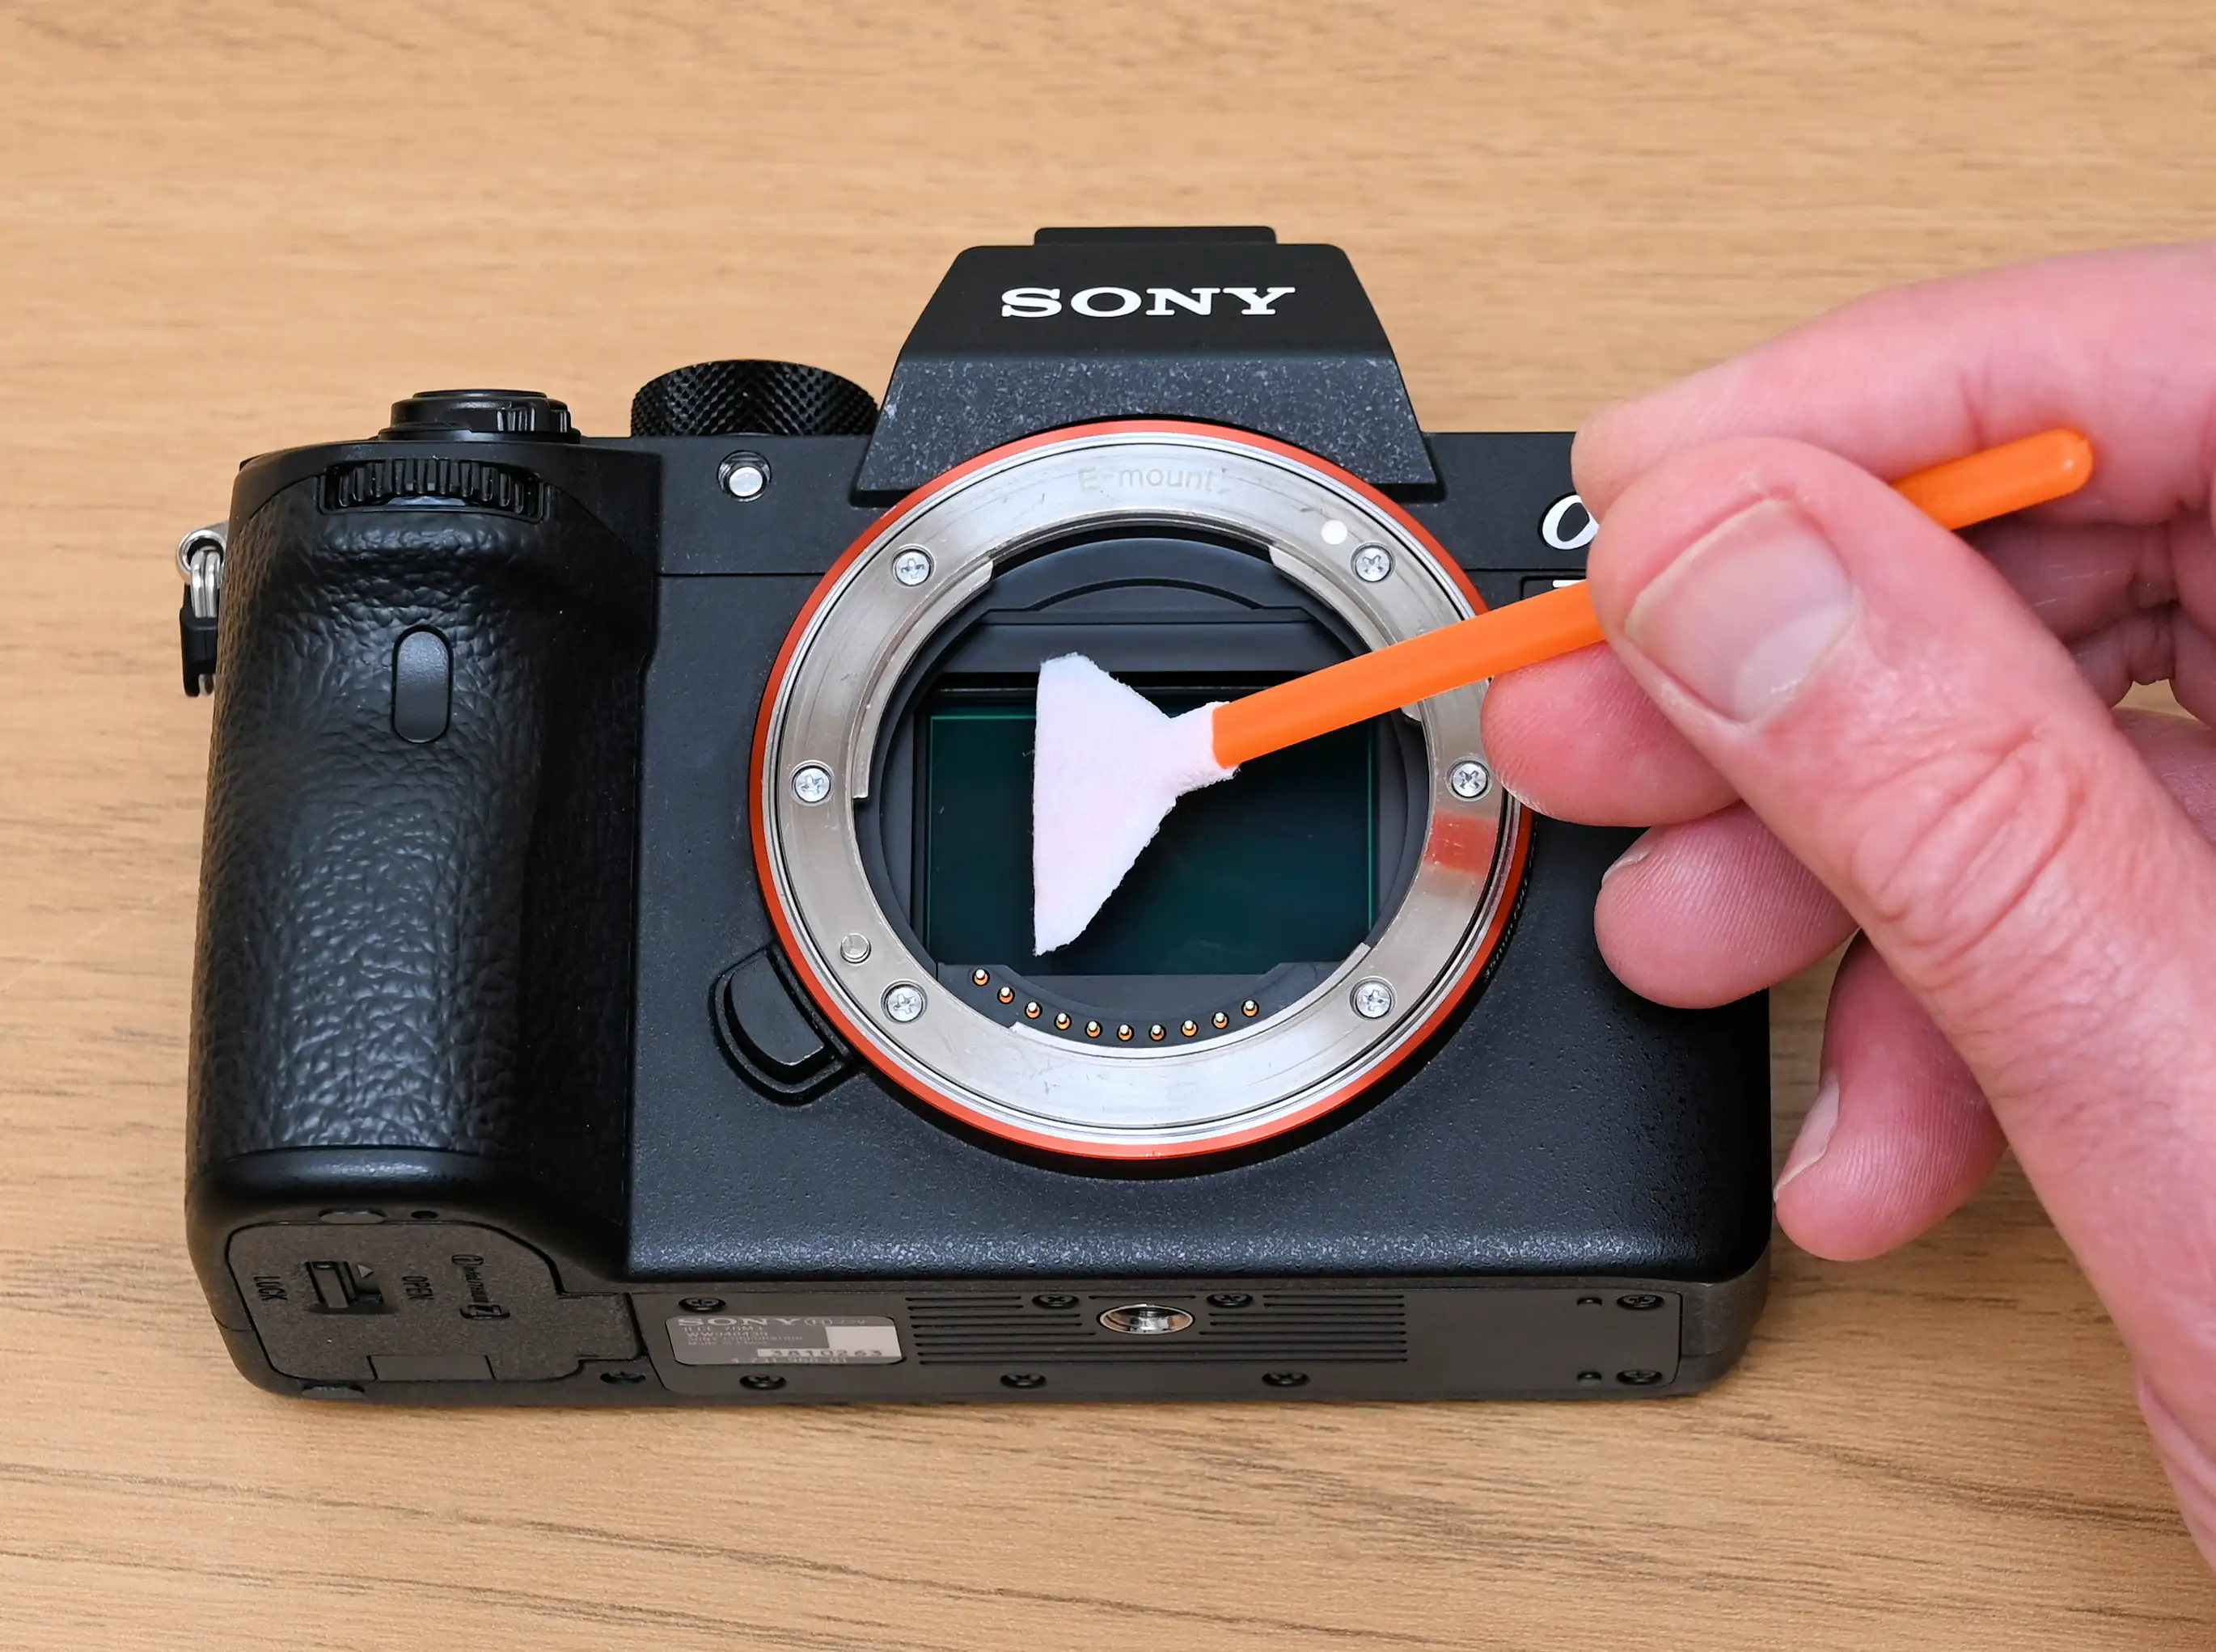
🧼 Step 3: Cleaning the Camera Sensor
Sensor cleaning is the most delicate task and should only be done when absolutely necessary. Some modern cameras are quite good at self-cleaning, but dust or sand may require manual attention.
When to Clean the Sensor:
- Spots or dust appear in the same place on multiple images.
- After shooting in dusty, sandy, or windy environments.
Safe Sensor Cleaning Steps:
- Check for dust: Take a test shot of a clear, bright surface (like the sky or a white wall) at a small aperture (f/22). Check for dark spots.
- Use a blower first: With the lens removed, gently blow dust off the sensor. Hold the camera facing downward so particles fall away.
- Use sensor swabs carefully: Only if the blower doesn’t remove stubborn dust. Use the size and type recommended for your sensor. Apply sensor cleaning solution to the swab and gently wipe according to the manufacturer’s instructions.
Warning: The sensor is extremely sensitive. If you’re unsure, consider professional cleaning to avoid permanent damage.
🌊 Step 4: Dealing With Moisture and Salt
After shooting near water, rain, or snow, moisture can be a hidden enemy. Salt, in particular, is corrosive and can damage metal contacts and lens coatings.
How to Handle Moisture:
- Wipe down gear immediately: Use a dry microfiber cloth for exterior moisture.
- Air-dry in a cool, dry place: Do not use hairdryers or direct heat.
- Check lens mounts and battery compartments: Saltwater residue can accumulate here. Clean gently with a dry cloth.
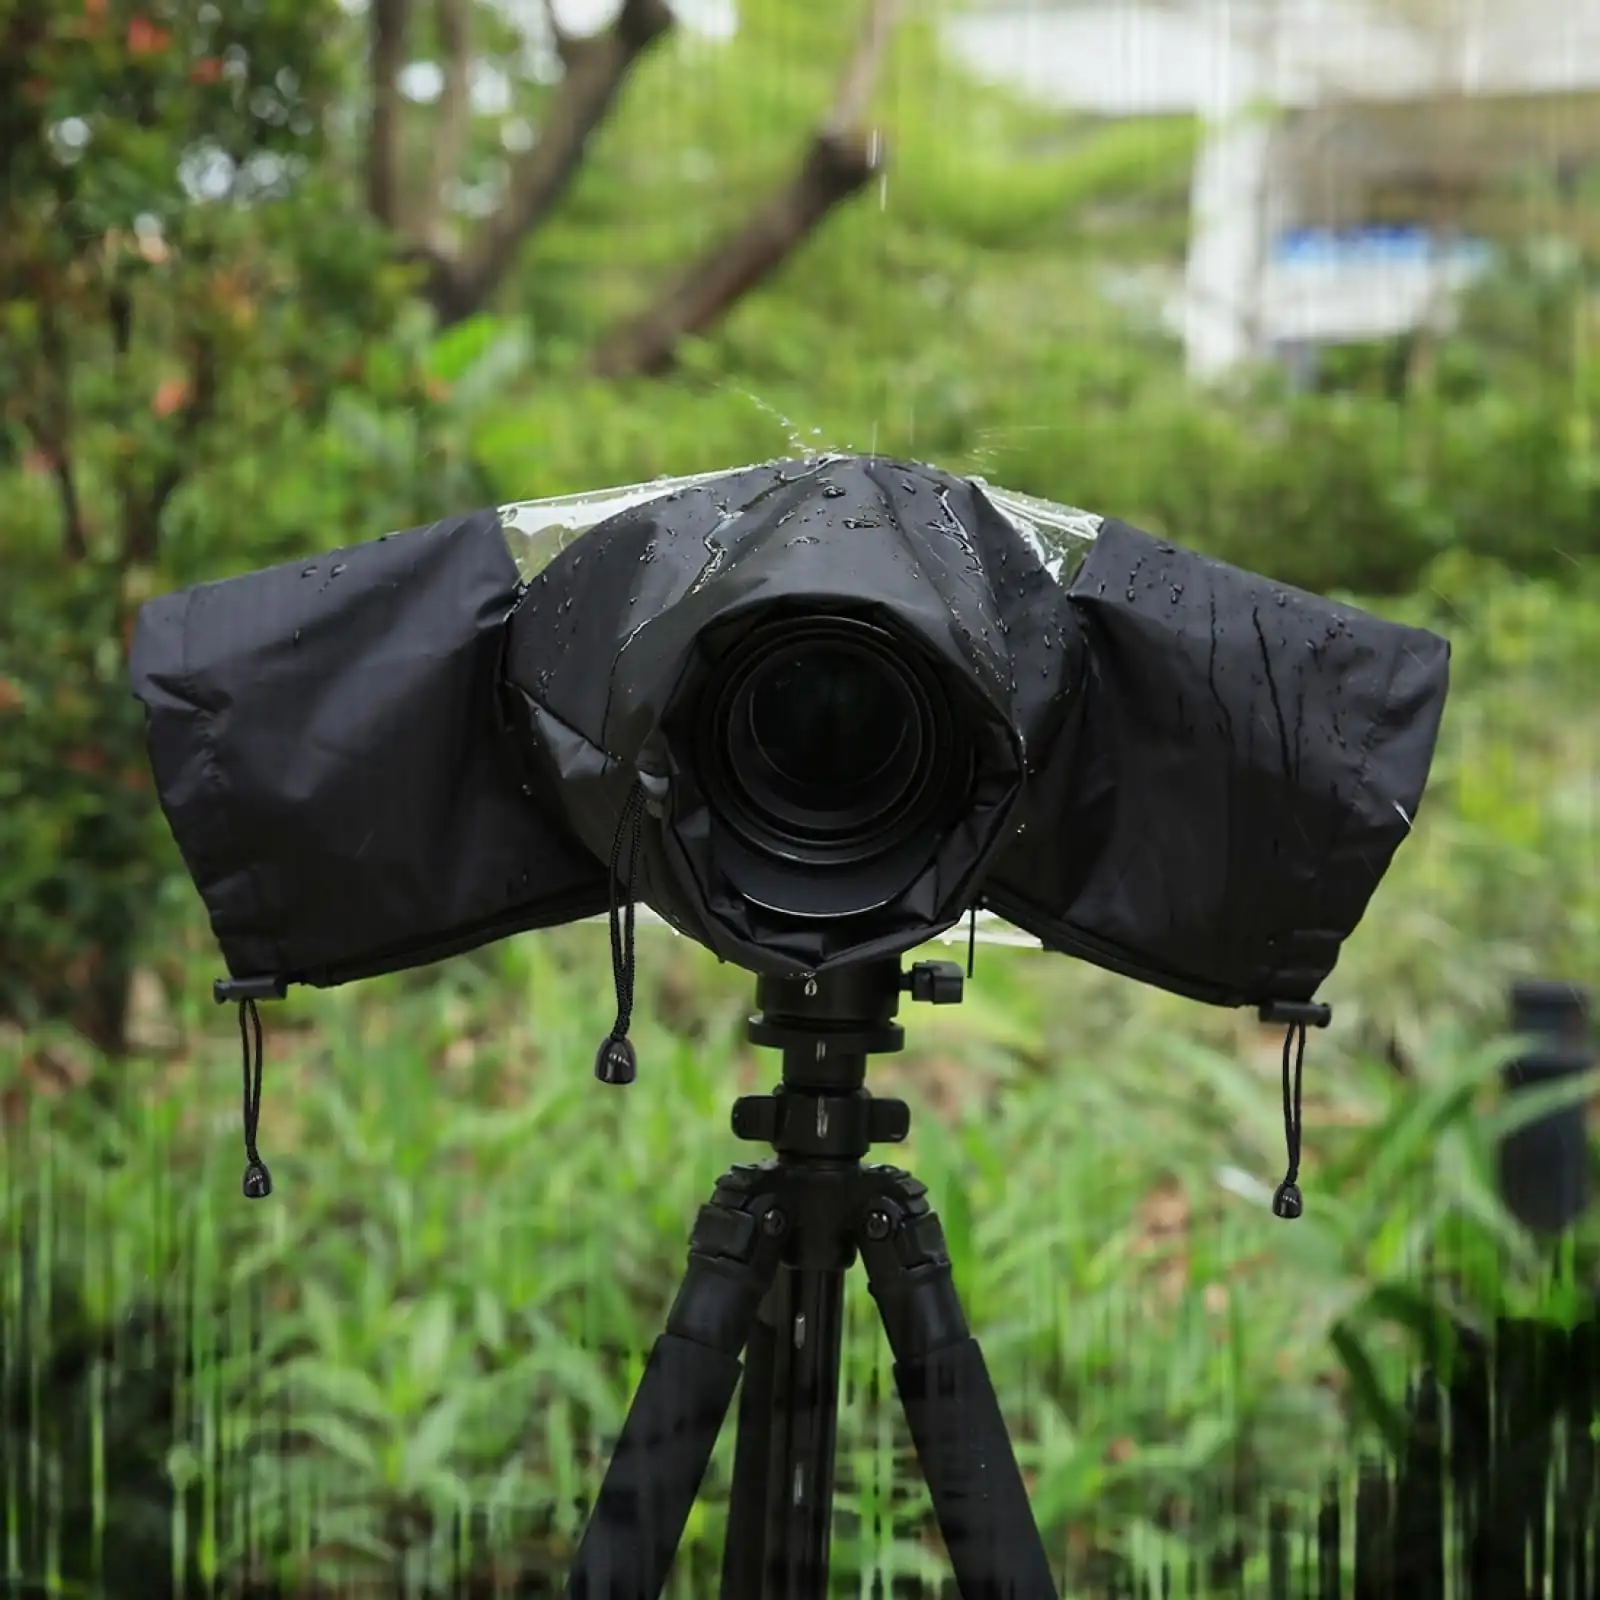
Extra tip: Consider carrying a rain cover or protective sleeve during shoots in wet conditions to minimize cleaning later.
🧽 Step 5: Cleaning Your Camera Bag and Accessories
Cleaning your camera and lenses isn’t enough if your bag is full of dust, sand, or moisture.
- Empty the bag: Shake out any debris.
- Wipe the interior: Microfiber cloths work well for dust. Vacuum gently if needed.
- Check dividers: Sand can scratch lenses if left inside compartments.
- Accessories: Wipe filters, straps, lens caps, and tripod plates. Don’t forget memory cards — a dry cloth is enough.
Keeping your bag clean reduces the risk of transferring dirt back onto your gear.
💡 Step 6: Regular Maintenance Schedule
Cleaning isn’t just post-shoot — a routine maintenance schedule will extend the life of your camera.
- Weekly: Wipe body, lens front/rear elements, and bag interior.
- Monthly: Check sensor for dust, clean contacts, and lens mounts.
- Seasonally: Inspect weather seals, deep-clean camera body, and check tripod mounts.
A little regular maintenance prevents costly repairs and keeps your images consistently sharp.
🛠 Recommended Gear for Cleaning
- Giottos Rocket Blower — gentle and effective for dust removal.
- Zeiss Lens Cleaning Kit — includes microfiber, solution, and brush.
- Sensor Swab Kits — choose the size for your sensor (full-frame, APS-C, etc.)
- Microfiber Cloths — soft and lint-free. Multiple cloths are handy to prevent cross-contamination.
Investing in proper cleaning tools is cheaper in the long run than sensor repairs or scratched lenses.
🏁 Final Thoughts
Cleaning your camera and lenses might feel tedious after a long shoot, but it’s worth every minute. Clean gear not only performs better, but it also lasts longer, protecting your investment and ensuring every shot is sharp and free of distractions.
Remember the simple rules:
- Always start with an air blower before touching the glass.
- Use microfiber cloths and lens-specific solutions.
- Handle the sensor with extreme care.
- Keep your bag and accessories clean.
A little post-shoot cleaning routine will save you headaches, improve your photos, and let you focus on what really matters — capturing great images.
Treat your camera like a friend, and it will reward you with years of stunning photos.